Cocos Creator Cannon Tutorial
I found Cocos Creator quite a while ago and figured it was about time to take a look. I initially followed there quick start guide to get a handle on how to work with the engine and get the basic concepts down. It seems a pretty reasonable extension to the original Cocos2d engine and I just want to play around with it. But that left out quite a lot of the parts of the engine I was interested in.
I then stumbled across the Cocos Creator Cannon Tutorial, but it’s built with Cocos Creator V1 and was a bit of a difficult thing to follow as it’s not aged well. It was still very useful and provided enough information to build my own version.
With a bit more hunting I found Philip Shen’s updated Tutorial which is a bit more up to date and well worth a read through. But by that point I found it I had already finished most of the project build using the features in Cocos Creator v2.2 and ended up with very similar solutions. Though I used JavaScript through out my build rather than TypeScript, just because I’m more familiar with it. Please do check out both tutorials as they provide a great intro for the engine.
The rest of the content below will go over how I built the tutorial and is little bit different as I wanted to test out slightly different approaches to things. It is going to be more of a guide / reminder for myself on how to do things.
1 : Create a new project
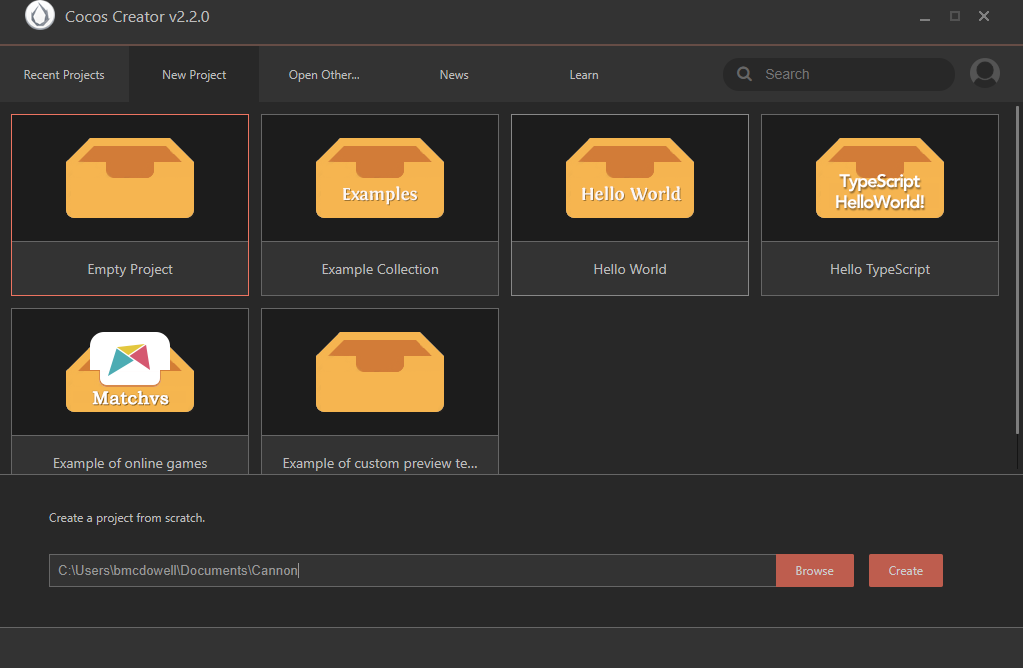
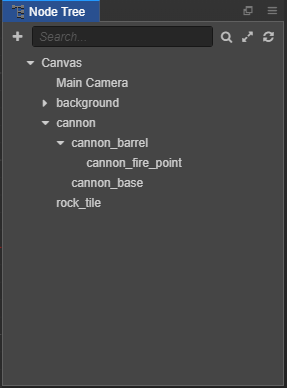
Open up Cocos Creator and select the new project tab, select the empty project an set the location that it’s to be saved too and click create. The last folder represents the project name that will be displayed when you open the project after closing it.
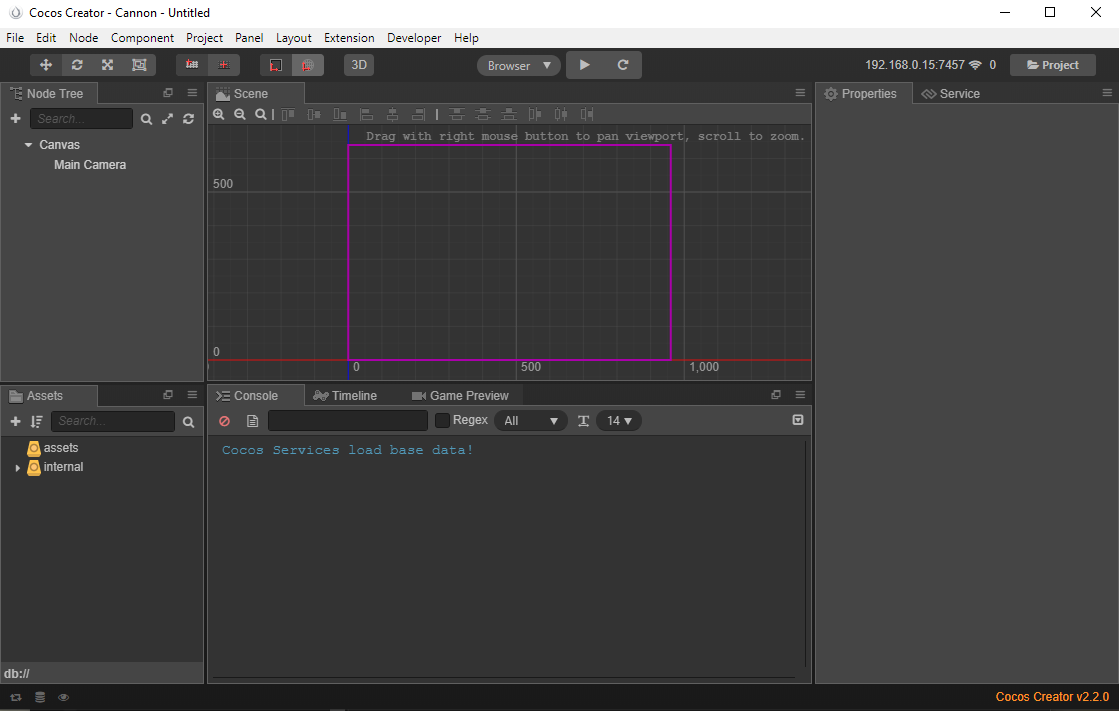
This will open a new empty project with a default scene, with the following tabs visible.
- Node Tree Tab : Nodes in the current scene.
- Scene Tab : Visual representation of the active items in the node tree, scale and position node items.
- Properties Tab : Display the scriptable properties of the node selected in the node tree or asset item.
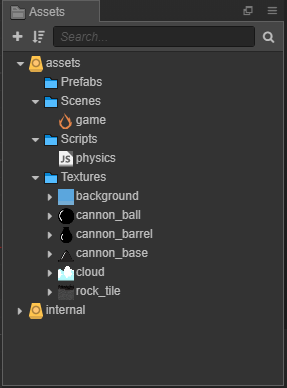
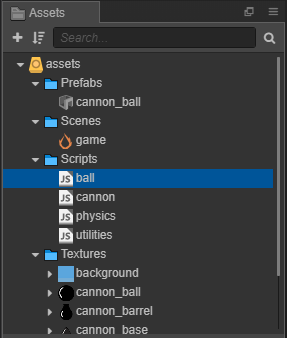
- Assets : Assets available to the game, it will contain the textures, scripts, sounds etc that will be used.
- Console : This will display any info emitted using the cc.info() cc.log(), cc.warn() or cc.error().
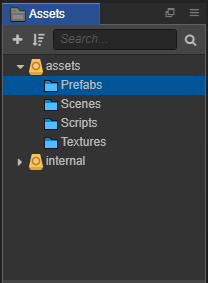
Right click the assets folder and create the core structure, this let’s you organize the assets into a sensible folder structure which is mirrored on the local disk.
2 : Enable physics
Cocos Creator requires the user to enable physics from a script this is easy to do by setting the following value in the physics manager.
cc.director.getPhysicsManager().enable = true;
You have a couple of choices where to do this one is using the engine initialization, this will enable it untill the engine shuts down.
cc.game.on(cc.game.EVENT_ENGINE_INITED, () => {
    let physicsManager = cc.director.getPhysicsManager();
    physicsManager.enabled = true;
});
Alternatively you can create a component and add it to the scene which is the root that I am going to take.
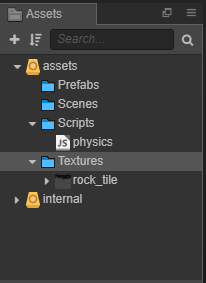
Right click the scripts folder and create a new javascript file and rename the file to be called physics. Double click it to open it in your code editor and add the following code. This will let you setup the physics within the scene, if you want to you could add the animatable attribute to the gravity property to permit this to be altered by the Timeline editor.
/** !#en
    This is the physics component and provides a scene level interface
    to configuring the directors physics manager.
*/
cc.Class({
    extends: cc.Component,

    properties: {
        active: {
            default: true,
            tooltip: "Enable / disable physics"
        },
        debug: {
            default: false,
            tooltip: "Enable / disable the debug flags"
        },

        gravity: {
            default: cc.v2(0, -10),
            tooltip: "Physics world gravity."
        },
        ptm_ration: {
            default: 32,
            tooltip: "The ratio transform between physics unit and pixel unit, generally is 32."
        },

        accumulator: {
            default: false,
            tooltip: "Enabled accumulator, then will call step function with the fixed time step FIXED_TIME_STEP."
        },
        fixedTimeStep: {
            default: 60,
            tooltip: "Specify the fixed time step.",
        },

        velocityIterations: {
            default: 10,
            tooltip: "The velocity iterations for the velocity constraint solver.",
        },
        positionIterations: {
            default: 10,
            tooltip: "The position Iterations for the position constraint solver.",
        }
    },

    // LIFE-CYCLE CALLBACKS:

    onLoad () {
        let manager = cc.director.getPhysicsManager();

        manager.enabled = this.active;

        if (this.debug) {
            manager.debugDrawFlags =
            cc.PhysicsManager.DrawBits.e_aabbBit |
            cc.PhysicsManager.DrawBits.e_pairBit |
            cc.PhysicsManager.DrawBits.e_centerOfMassBit |
            cc.PhysicsManager.DrawBits.e_jointBit |
            cc.PhysicsManager.DrawBits.e_shapeBit;
        }
        else {
            manager.debugDrawFlags = 0;
        }

        manager.gravity = this.gravity;
        manager.PTM_RATIO = this.ptm_ratio;

        manager.enabledAccumulator = this.accumulator;
        manager.FIXED_TIME_STEP = 1/this.fixedTimeStep;

        manager.VELOCITY_ITERATIONS = this.velocityIterations;
        manager.POSITION_ITERATIONS = this.positionIterations;
    },

    onDestroy () {
        let manager = cc.director.getPhysicsManager();

        // Disable the physics when destroyed
        manager.enabled = false;
        // Reset the debug flags
        manager.debugDrawFlags = 0;
    }
});
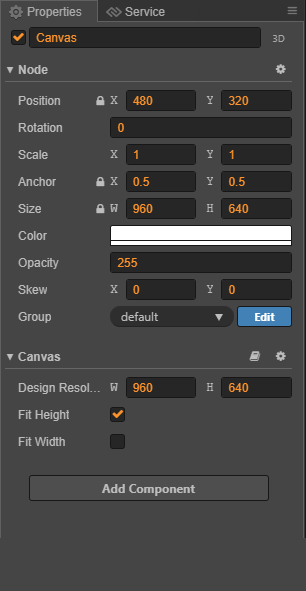
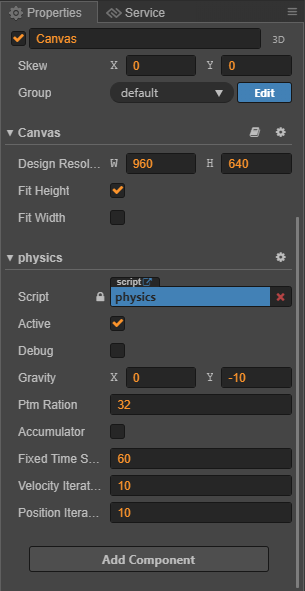
Select the Canvas in the Node Tree, this will show the properties for that node. Add the custom physics component using the button in the tab. This will auto enable physics when the scene is loaded. You can enable the physics debug draw by clicking the debug check box in the physics component.
3 : Added the floor
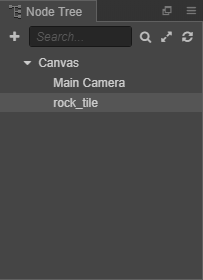
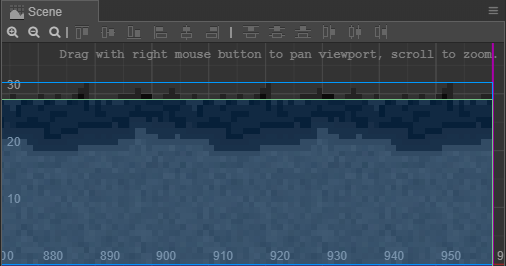
First a texture for the ground needs to be asset folder, grab something suitable from Open Game Art or grab this floor tile. Add it to the assets texture folder. You can then drag it from there onto the canvas in the node tree, it should then be visible in the scene. If it looks blurry you can update the sprite filter mode to use Point and that should fix that.
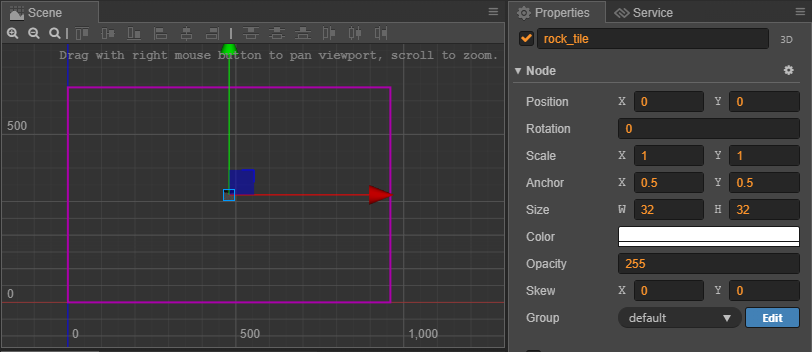
It will be placed in the center of the scene which is not great. Use the properties panel to fixup the position and size of the sprite.
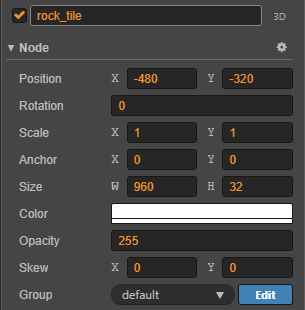
![]()
- Set the Node anchor to 0,0 this will set it to the bottom left.
- Set the Node position to -480, -320 to move it to the bottom left corner of the scene.
- Set the Node width of the node to be 960 this will stretch it across the bottom of the scene.
- Set the Sprite type to be TILED which will cause it to repeat nicely.
The next thing is to add the physics component to the floor node, in the properties tab click add component and select Physics Component>Collider>Box. This will add a RigidBody and PhysicsBoxCollider to the node.
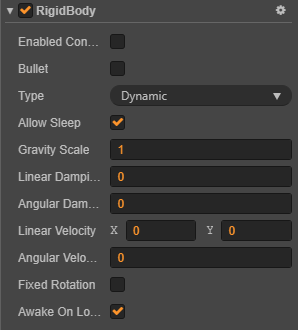
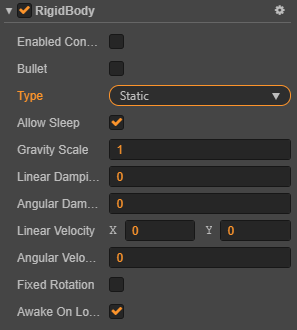
Update the RigidBody type to be Static this will stop it moving in the scene and let dynamic object collide with it, but not move it.
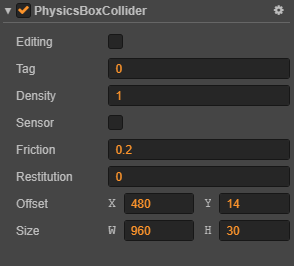
The PhysicsBoxCollider will default to the size of the sprite which in this case will be 960, 32, as the floor tile has some alpha at the top update the size to be 960, 30 and offset to 480, 14 this will shift the collision to just below the visible surface so items don’t look like there floating.
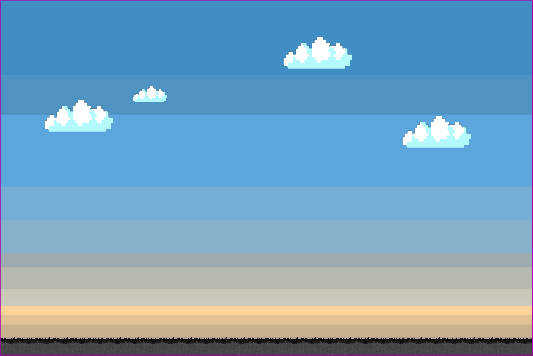
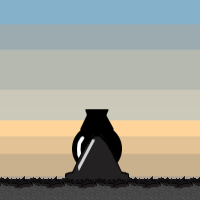
At this point I added a background or some sky to fill the scene, this will make it easier to see both the projectiles / bullets and the meteors that will be added. It’s a tiled sprite and is placed below the above the floor in the node tree so it’s rendered behind it.
4 : Adding the cannon
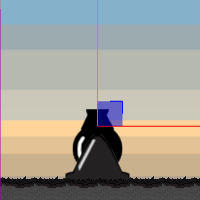
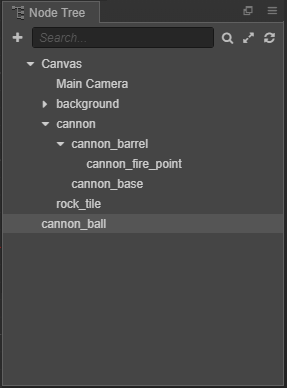
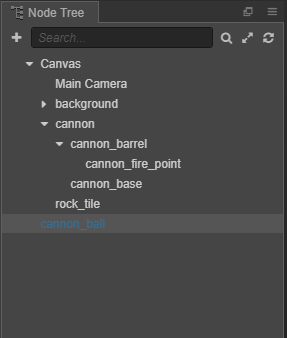
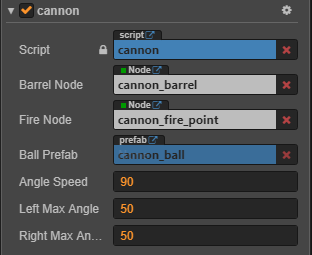
Grab the cannon base, barrel and ball textures and add them to the Textures asset folder. Select the Canvas then click the plus icon in the Node Tree tab and add an empty node, rename this to be called cannon. Drag the cannon barrel and cannon base textures onto it, making sure the barrel is rendered behind the barrel. Select the cannon barrel in the Node Tree and add another empty node, rename this to be called cannon_fire_point this will be the position that’s used to spawn the cannon ball.


Update the properties so they make a bit more sense and the cannon looks like a cannon.
- Set the cannon Node anchor to 0.5,0 this will set it to the bottom center.
- Set the cannon Node position to -383,-269 so it looks like it’s sitting on the floor.
- Set the barrel Node position to 0,16 so it looks like it’s sitting on the pivot.
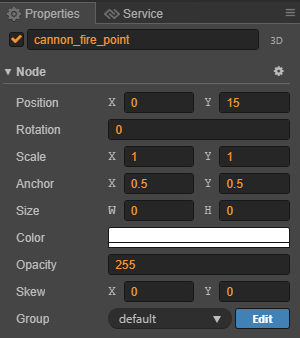
- Set the fire point Node position to 0,15 so cannon balls will leave the muzzle.
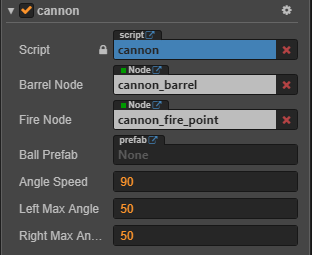
Right click the scripts folder and create a new javascript file and rename the file to be called cannon. Double click it to open it in your code editor and add the following code.
cc.Class({
    extends: cc.Component,

    properties: {
        barrelNode: {
            default: null,
            type: cc.Node,
            tooltip: "Barrel node that will be rotated"
        },
        fireNode: {
            default: null,
            type: cc.Node,
            tooltip: "Fore node that the cannon ball will be fired from, this should be in the barrel part of the node tree"
        },
    },
});
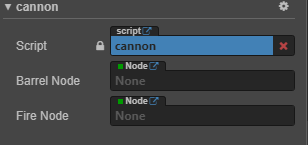
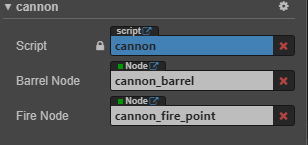
Add this custom component to the cannon then drag the barrel and fire point nodes from the Node Tree to the visible properties.
Create a new JavaScript file called utilities.js, this will be used to hold some extra functions that Cocos Creator does not provide. Add the below code into that file and put require(“utilities”); at the top of the cannon.js file.
/* Convert degrees to radian */
Math.rad = function(deg){ return deg * Math.PI / 180 };
/* cos with degrees input */
Math.cosd = function (deg) { return Math.cos(Math.rad(deg)); };
/* sin with degrees input */
Math.sind = function (deg) { return Math.sin(Math.rad(deg)); };
/* clamp a value between a range */
Math.clamp = function (val, min, max) { return val < min ? min : val > max ? max : val; };
/* random number between a range */
Math.randomBetween = function (a, b) { return Math.floor(Math.random() * (b - a + 1) + a); };
Add the following properties to the class, these are going to be used when we add code to rotate the cannon barrel.
  /* Angle of rotation per second */
  angleSpeed: 90,
  /* Max left angle supported */
  leftMaxAngle: 50,
  /* Max right angle supported */
  rightMaxAngle: 50,
Now add the following to the class, the _speed is a private variable that will be used to control the cannon rotation and will be set once the input control has been added.
    onLoad () {
        this._speed = 0;
    },

    onDestroy () {
        this._speed = 0;
    },

    update (dt) {
        if (this._speed !== 0) {
            /* Angle to rotate this frame */
            let rotate_by = this.angleSpeed * this._speed * dt;
            /* Apply the rotation and limit the angles */
            this.barrelNode.angle = Math.clamp(this.barrelNode.angle + rotate_by, -1 * this.rightMaxAngle, this.leftMaxAngle);
        }
    },
Add the key control functions, pressing the left or right will update the _speed and cause the barrel to rotate.
    onKeyDown: function(event) {
        switch(event.keyCode){
            case cc.macro.KEY.left:
                this._speed = 1;
                break;
            case cc.macro.KEY.right:
                this._speed = -1;
                break;
        }
    },

    onKeyUp: function(event) {
        switch(event.keyCode){
            case cc.macro.KEY.left:
            case cc.macro.KEY.right:
                this._speed = 0;
                break;
        }
    },
The one thing that is missing are the binds required to get the system to call these functions, update the onLoad / onDestroy with the following. This will enable the system key events to call the above functions, hit play and the cannon should be controllable with the left and right arrow keys.
    onLoad () {
        this._speed = 0;
        cc.systemEvent.on(cc.SystemEvent.EventType.KEY_DOWN, this.onKeyDown, this);
        cc.systemEvent.on(cc.SystemEvent.EventType.KEY_UP, this.onKeyUp, this);
    },

    onDestroy () {
        this._speed = 0;
        cc.systemEvent.off(cc.SystemEvent.EventType.KEY_DOWN, this.onKeyDown, this);
        cc.systemEvent.off(cc.SystemEvent.EventType.KEY_UP, this.onKeyUp, this);
    },
5 : Firing the cannon
First we need to create a projectile that can be fired, drag the cannon ball texture onto the node tree.
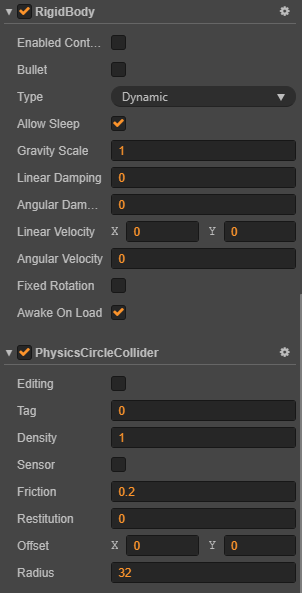
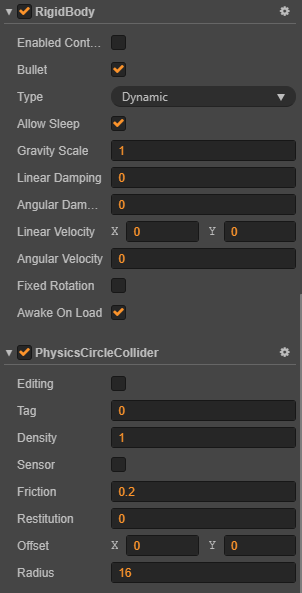
Add a PhysicsCircleCollider component to the cannon ball.
- Tick the Bullet setting in the RigidBody to stop it passing through objects.
- Set the collider Radius to 16 so that it tightly fits the visible object.
At this point if you move the ball above the floor and hit play you should see it drop.
cc.Class({
    extends: cc.Component,

    properties: {
        timeToLive: 10,
    },

    onLoad () {
        this._lifeTime = 0;
    },

    update (dt) {
        if (!cc.isValid(this.node)) return;

        if (this._lifeTime >= this.timeToLive) {
            this.node.destroy();
        }
        else {
            this._lifeTime += dt;
        }
    },
});
Add a new script and rename it to ball, add the above code to the file and added the component to the cannon ball.
Drag the cannon ball into the Assets Prefabs folder to create the prefab, you should see the item turn blue in the Node Tree once you have. You can now uncheck the tick box at the top left of the properties to disable the object in the scene. Prefabs can be updated by clicking the save button above the name in the properties tab.
Now that we have a ball to fire from the cannon, switch back to the cannon.js file update the properties to include a prefab item for the ball.
    properties: {
        barrelNode: {
            default: null,
            type: cc.Node,
            tooltip: "Barrel node that will be rotated"
        },
        fireNode: {
            default: null,
            type: cc.Node,
            tooltip: "Fore node that the cannon ball will be fired from, this should be in the barrel part of the node tree"
        },
        ballPrefab: {
            default: null,
            type: cc.Prefab,
            tooltip: "Object that will be fired out of the cannon"
        },

        /* Angle of rotation per second */
        angleSpeed: 90,
        /* Max left angle supported */
        leftMaxAngle: 45,
        /* Max right angle supported */
        rightMaxAngle: 45,

        /* velocity to fire the ball with */
        velocity: 600,
    },
Drag the prefab from the assets folder over into the cannon’s property.
    fireBall: function() {
        if (this.ballPrefab !== null){
            let ball = cc.instantiate(this.ballPrefab);
            ball.parent = this.fireNode;
            ball.active = true;
            ball.position = cc.v2(0, 0);

            let angle = -this.barrelNode.angle;
            let body = ball.getComponent(cc.RigidBody);
            if (body) {
                body.linearVelocity = cc.v2(Math.sind(angle) * this.velocity, Math.cosd(angle) * this.velocity);
            }
        }
        else {
            log.warning("Failed to create ball as the prefab is null");
        }
    },
Add the above function into the cannon.js file, this will be used to create a new instance of the prefab add it to the world and update it’s initial linear velocity.
    onKeyDown: function(event) {
        switch(event.keyCode){
            case cc.macro.KEY.left:
                this._speed = 1;
                break;
            case cc.macro.KEY.right:
                this._speed = -1;
                break;
            case cc.macro.KEY.space:
                this.fireBall();
                break;
        }
    },
Update the onKeyDown so that pressing space will fire a cannon ball. You can hit play now and you should be able to fire ball’s out of the cannon.
Lets update the code so that we don’t need to create / destroy cannon balls. To do this we are going to add a NodePool to the cannon component and return the items to that pool from within the ball component.
    properties: {
        ...

        /* number of cannon balls to create onLoad */
        poolSize: 15,
    },

    ...

    /* Use the pool to fire cannon balls */
    fireBall: function() {
        if (this._pool !== undefined){
            if (this._pool.size() > 0) {
                var ball = this._pool.get();
                ball.parent = this.fireNode;
                ball.active = true;
                ball.position = cc.v2(0, 0);

                let angle = -this.barrelNode.angle;
                let body = ball.getComponent(cc.RigidBody);
                if (body) {
                    body.linearVelocity = cc.v2(Math.sind(angle) * this.velocity, Math.cosd(angle) * this.velocity);
                }
            }
            else {
                log.message("Failed to create cannon ball as the pool is empty");
            }
        }
        else {
            log.warning("Failed to create cannon ball as the pool is invalid");
        }
    },

    ...

    onLoad () {
        this._speed = 0;
        this._pool = new cc.NodePool();

        // Build a pool of cannon balls so that we can reuse them
        // this stops the game creating / destroying objects
        if (this.ballPrefab !== null){
            for (let i = 0; i < this.poolSize; ++i) {
                let ball = cc.instantiate(this.ballPrefab);
                let component = ball.getComponent("ball");
                if (component && component.setPool) {
                    component.setPool(this._pool);
                }
                this._pool_.put(ball);
            }
        }
        else {
            log.warning("Failed to create cannon ball pool as the prefab is null");
        }

        cc.systemEvent.on(cc.SystemEvent.EventType.KEY_DOWN, this.onKeyDown, this);
        cc.systemEvent.on(cc.SystemEvent.EventType.KEY_UP, this.onKeyUp, this);
    },

    ...
Update the cannon component with the above changes, this creates a number of cannon balls onLoad and stores them in the NodePool. The number of items places in this pool is added to the properties and can be set from the properties tab. When you press the space bar to fire a new cannon ball it grabs one from the pool and runs through the setup as normal, if the pool is empty and you try to fire it will emit a message to the console.
    ...

    setPool(pool) {
        this._pool = pool;
    },

    destroyOrReturn2Pool() {
        if (this._pool !== undefined){

            /* Reset the internal values */
            this._lifeTime = 0;

            this._pool.put(this.node);
        }
        else {
            this.node.destroy();
        }
    },

    ...

    update (dt) {
        if (!cc.isValid(this.node)) return;

        if (this._lifeTime >= this.timeToLive) {
            destroyOrReturn2Pool();
        }
        else {
            this._lifeTime += dt;
        }
    },
Update the ball component with the above changes, this will return the Node to the pool in the cannon class rather than just destroying it.
You can hit play now and you should be able to fire 15 cannon ball’s with in a 10 seconds time period. They will then place them selves back in the NodePool and can be fired again.
6 : Adding the meteor
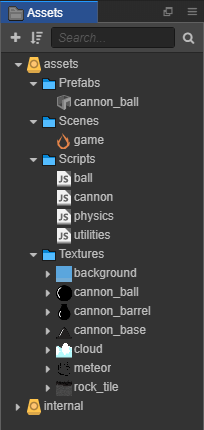
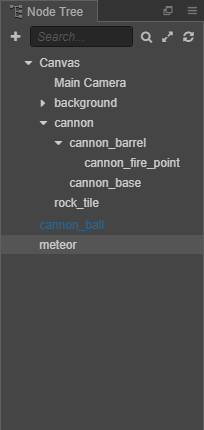
First we need to create a meteor that will be dropped, drag the meteor texture onto the node tree.
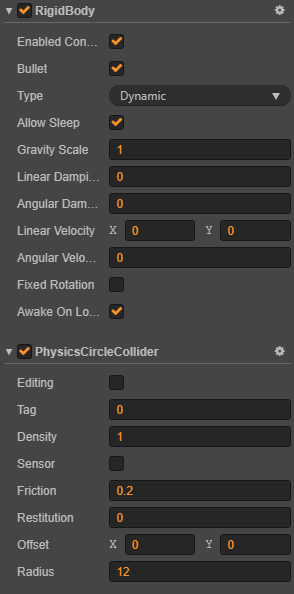
Add a PhysicsCircleCollider component to the cannon ball.
- Tick the Enable Contact
- Tick the Bullet setting in the RigidBody to stop it passing through objects.
- Set the collider Radius to 12 so that it tightly fits the visible object.
At this point if you move the meteor above the floor and hit play you should see it drop.
cc.Class({
    extends: cc.Component,

    // will be called once when two colliders begin to contact
    onBeginContact: function (contact, selfCollider, otherCollider) {
        this.node.destroy();
    },
});
Add a new script and rename it to meteor, add the above code to the file and added the component to the meteor in the Node Tree. If you hit play you should see it drop and disappear once it touches the floor.
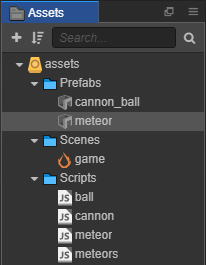
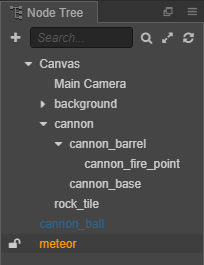
Drag the meteor node into the Assets Prefabs folder to create the prefab, you should see the item turn blue in the Node Tree once you have. You can now uncheck the tick box at the top left of the properties to disable the object in the scene.
7 : Dropping meteors
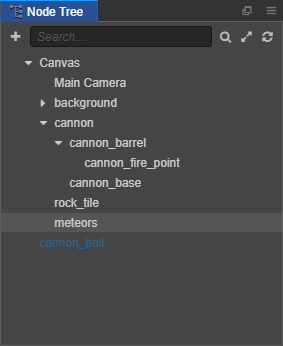
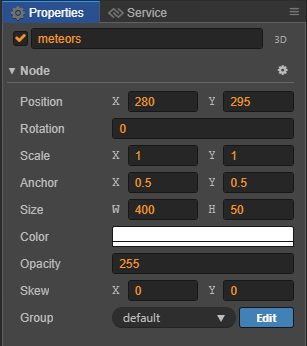
Add an empty node under the canvas and rename it meteors. The are that the node takes up will be used to launch meteors from, update the properties so there is a bit of space to fire them from.
- Set the Node position to 280, 295 to move it to the top right corner of the scene.
- Set the Node size of the node to be 400, 50 this will stretch it across the top corner of the scene.
Right click the scripts folder and create a new javascript file and rename the file to be called meteors. Double click it to open it in your code editor and add the following code.
require("utilities");

cc.Class({
    extends: cc.Component,

    properties: {
        meteorPrefab: {
            default: null,
            type: cc.Prefab,
            tooltip: "Object that will be dropped as a meteor"
        },

        meteorSpawnMinTime: .5,
        meteorSpawnMaxTime: 1,

        meteorSpawnMinAngle: 0,
        meteorSpawnMaxAngle: -30,

        meteorSpawnMinVelocity: 100,
        meteorSpawnMaxVelocity: 200,
    },
});
Update the file to include the function that will be used to drop the meteor.
    dropMeteor() {
        if (this.meteorPrefab) {
            const width = this.node.width;
            const height = this.node.height;

            const x = (Math.random() * width) - (this.node.width * this.node.anchorX);
            const y = (Math.random() * height) - (this.node.height * this.node.anchorY);
            const angle = 180 + Math.randomBetween(this.meteorSpawnMinAngle, this.meteorSpawnMaxAngle);
            const velocity = Math.randomBetween(this.meteorSpawnMinVelocity, this.meteorSpawnMaxVelocity);

            var meteor = cc.instantiate(this.meteorPrefab);

            meteor.parent = this.node;
            meteor.active = true;
            meteor.position = cc.v2(x, y);

            var body = meteor.getComponent(cc.RigidBody);
            if (body) {
                body.linearVelocity = cc.v2(Math.sind(angle) * velocity, Math.cosd(angle) * velocity);
            }
        }
        else {
            log.warning("Failed to create meteor as the prefab is invalid");
        }
    },
We can also update it to include the Scheduler that will be used to trigger the function above.
    scheduleCreateMeteor() {
        cc.director.getScheduler().schedule(this.dropMeteor, this, Math.randomBetween(this.meteorSpawnMinTime, this.meteorSpawnMaxTime), false);
    },

    createMeteorAndScheduleNext() {
        this.createMeteor();
        this.scheduleCreateMeteor();
    },

    start () {
        this.scheduleCreateMeteor();
    },
Save the changes and add this custom component to the meteors Node.
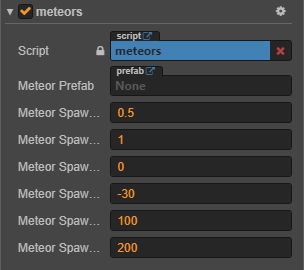
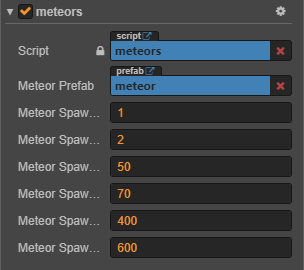
Drag the cannon prefab from the assets folder over into the cannon’s property and setup the meteors configuration to your liking.
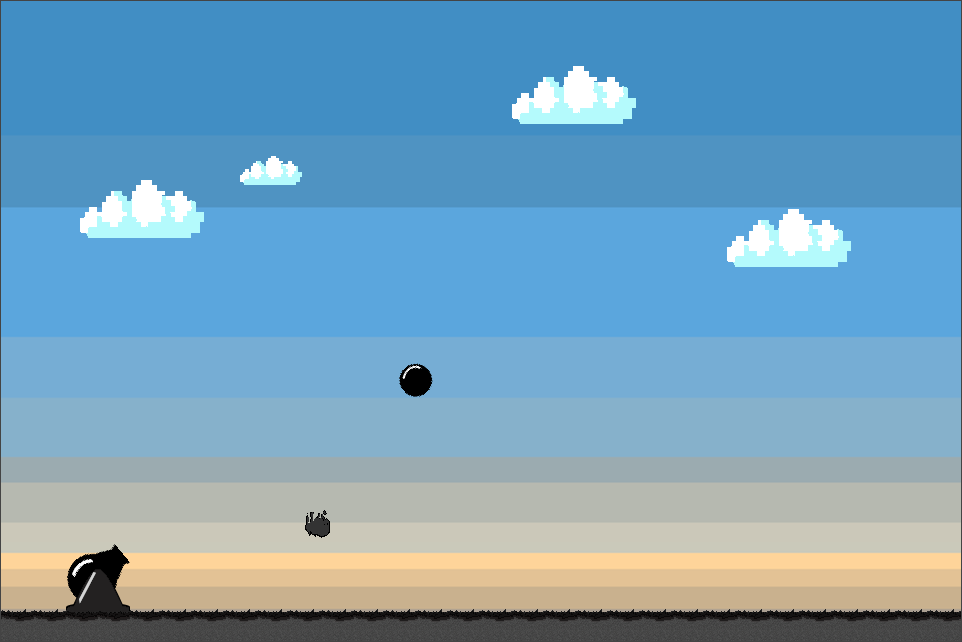
8 : The Result
If you hit play at this point you should be able to use the cannon to shoot down the meteors. There is still more to do but I think that this is enough for this tutorial. Hit the button below to see what I ended up with.